Feeds:
Posts
Comments
Sadly, you'll never see this in my garden.

Sadly, you’ll never see this in my garden.

If you hang around me more than a few minutes, I’m going to figure out a way to bring up the subject of raising food. It might be livestock, but more likely it will be fruits and vegetables. I love growing edibles, one look and you can tell I love eating them, and I love talking about growing food.

There are lots of people who are better gardeners than I am, and maybe one or two who aren’t, but nobody likes talking gardening more than me. Ask anyone.

There are, though, some things I can grow really well, and others that I just can’t grow even if my life depended on it. Today, just for giggles, I’m going to tell you my absolute best and worst.

Let’s start with best, because it’s easy. Most of you already know what it is. My most prolific results come from hot peppers. So far, I have never gotten a bad result from hot peppers. Sweet varieties have been a little more difficult, though I’m getting the hang of them, but the hot varieties are like in my DNA.

I’ve cut back in recent years, because I get so many peppers I can’t figure out what to do with them. Around here where we live, there aren’t many people who like the hotter ones. In fact, we have friends who don’t even use black pepper. As a result, a lot of my peppers end up dried and turned into powder. I have dried cayenne peppers from 2009 in the pantry. I kid you not.

This year I only grew 5 varieties of hot peppers: jalapeno (3 plants), Habanero (4 plants), Thai (3 plants), Yellow Ghost (three plants), and Yellow Moruga (1 Plant) and I have harvested enough to last us years. I will make one more harvest at the end of this week and then simply pull the plants up.

As successful as my peppers have been, there is a fruit I simply can’t grow; cantaloupe. I have NEVER successfully harvested and eaten a cantaloupe that I have grown myself. A couple of years they all burned up, one year the chickens got them all, but the biggest heartache of all was the year I had several one day from a planned harvest and one of my dogs got into the garden and ate all the ripe ones. We know it was her because A. we caught her in the act, and B. she crapped seeds for days.

Do I sound bitter? You bet I am. The truth hurts. I didn’t even try to grow any this year. I will try again….eventually.

So there you have it; the thrill of victory and the agony of defeat. What about you? Are there things you grow well? Varieties you can’t grow for love nor money? Jump on the comments page and tell us about it. Spill.

fertilizerEverything in the food chain needs to eat. From humans all the way down to beneficial bacteria; we all eat. A few species along the way are mostly carnivores, a few are herbivores, but the majority are omnivores, including the soil and the many of the microbes that live in that soil. For the sake of time and the focus of this article, though, we’re going to stick to discussing our soil and the nutrients our fruit and veggies need to grow and thrive.

Many gardeners think of the earth as merely a growing medium, something to hold plants while they grow, but it’s so much for than that. Think of the earth as either growing or dying.  The way we treat the soil, whether in beds or containers, will either develop and grow the soil or it will kill it.

The soil is the receptacle that houses the nutrients that grow our plants. Water is the vehicle that transports the nutrients TO the plants, as they are on a liquid diet, so to speak.

Plants require several nutrients; primarily Nitrogen, Phosphorus, and Potassium, (NPK).  Most commercial garden fertilizers advertise their NPK ratios right on the bag or box. As an example, you might see 5-5-5 or 4-1-1, etc. In the first case, it means 5 parts Nitrogen, 5 parts, Phosphorus, and 5 Potassium. The second example is 4 parts N, and one part each of P and K.

Each variety of fruit and veg you grow has its own requirements, so one size doesn’t always fit all. A good, healthy nutrient rich soil will go a long way to meeting most plants needs and your fertilizer will mostly supplement what’s there.  Before we go, I’m going to show you a great workaround in choosing your fertilizer.  But first I want to show you how to minimize your requirements for them.

If NPK was all plants needed, things would be pretty simple, but the truth is, plants need much more. NPK are called Macronutrients, while the lesser requirements are called micronutrients. However, there are some others I consider Macronutrients, because they make a huge difference in performance.

The first is Magnesium. Magnesium is to plants what Vitamin B complex is to humans. It boosts energy and vitality. The easiest way to get Magnesium to your garden is via Epsom salts, which by the way, are not salts at all.  While I add some to my garden beds, most of the time, I add the Epsom salts to my regular watering regime.  It is easily dissolved and is very easy for plants to take absorb it through their leaves, or to take it up via their roots.

Secondly, plants need Calcium, especially varieties that produce fruit like tomatoes, peppers, squash, cucumbers, etc. There are some great water soluble Calcium products, but it’s really easy to add garden lime, egg shells, oyster shell or something similar to the soil at the beginning of the garden season when you’re working your beds.

Third is iron. We don’t think of it enough.  There are many great natural products on the market to enrich the iron content of your soil. Remember, the general principle is, we feed the soil so the soil can feed the plants. Are we making sense so far?

Oh, something that happens more frequently that we realize is what’s called, nutrient lockout.  The short version is, there are nutrients in the soil, but the plants can’t access them. This is where beneficial bacteria (microbes) come in.  One of the best supplements you can use if you have a particularly bad patch, would be humates.  Humates, mostly humic acid help bind the carbon to the nutrients so   your plants can take advantage of those nutrients.  Humates are available in bag form and in liquid concentrate.  In bag form it’s added directly to the bed and worked into the soil. In liquid form, it’s diluted and added either directly to the soil, or used as a foiliar spray.

Many studies have shown that humates improve nutrient uptake by 30% to 50%.  That’s huge. In an future update, I will focus on the benefits and types of humates, but for now, let’s get the principles.

There are many types of soil amendments available to build soil; straw, wood chips, perlite, leaves, all come to mind right away. If you’re going to use wood chips or straw, I encourage adding them the autumn before you plan to plant to give them time to better decay. Perlite and leaves can be added when you begin to work up your beds. I’ll explain about the wood chips in a future update.

Obviously, good rotted horse, cow, or chicken manure is awesome.  But make sure it is well rotted.  The best ways to do that are to make a compost pile and let nature take its course, or to add some compost worms to the edges of the pile after it’s been standing a few weeks.  A third way, and maybe the best, is to let chickens have access to your compost pile.

Better than any of those other manures is rabbit manure. Rabbit manure is not ‘hot’ like what comes from more traditional livestock. In simple terms, the nitrogen and ammonia in most manures is so rich and dense that it can burn the roots of plants. Rabbit manure is ‘cold’, as if it’s already been composted.   Goat manure is great, too, but they aren’t usually confined like rabbits, so it’s harder to get it raked up and used. Goat manure from a stall or paddock is usually full of straw or wood chips, and needs a great deal of composting.

If you have a pet rabbit, you’re already in luck. If you don’t maybe it’s time to consider it. J.  A pair of bunnies will provide hours of enjoyment, loads of baby cuteness, tons of fertilizer, and for true omnivores, many pounds of the healthiest meat on the planet. I know that here in the USA, we think of rabbits as either pests or pets, but with the possible exception of goat meat, rabbit is the most consumed meat in the world.  Ask any heart specialist about the value of rabbit meat.  (Note: we’re not going to debate eating rabbits. This is an omnivore site and I’m an omnivore. If you don’t want to eat rabbit, no worries, don’t. Just enjoy them as pets and as little fluffy manure factories.)

The great thing about rabbit manure is that you can apply it directly to the garden without composting.  Talk about convenience.  In the early days, I would just empty the trays below the cages into a wheelbarrow and take it straight to the garden beds.  These days, I prefer to put it in my worm compost bins.  The worms compost the rabbit poo fairly quickly and the compost is even better than the straight rabbit manure.

So, worm composted rabbit manure is my number one choice for the garden. Straight rabbit manure is my second choice, and worm castings are number 3.

In a future episode, I’ll give you a secret recipe for the perfect compost mix, but this is the fertilizer issue, so I’m going to share two very similar fertilizers that in my experience are the best options for new and intermediate gardeners.

The first is Sea Grow 16-16-16.

This is a water soluble, seaweed based formula that is perfectly balanced and contains micronutrients.  The only thing you need to add is calcium and magnesium. It is ideal for raised beds and containers.  If you have a good soil mix to begin with, you can dilute the Sea Grow to a 50% strength with some calcium/Magnesium and you’ll have great results.  I mostly use a hose end sprayer, but in the greenhouse, when I’m feeding, I will mix the sea grow in a watering can.

My second recommendation is very similar to Sea Grow and is called MaxSea 16-16-16. Instructions are the same.

I also use both products in small Deep Water Culture Hydroponics systems for growing lettuce and greens. IMO, the Sea Grow gets better results in hydroponics systems, but there is no difference between them when I use them in soil.

There are other formulas in both products that are designed for different growth stages.  Frankly, in soil and container gardens, I haven’t seen the benefits of the ‘bloom’ formulas. If you’re going to grow blooming and fruiting plants hydroponically, then adding the bloom formula to the mix once buds appear, can improve results.  But we’ll save that for another day.

If you don’t want to deal with mixing water soluble formulas, then consider the Jobe’s line of products or the line from Espoma.  Both are available from most garden centers and big box stores.  In the long run, I believe the Sea Grow and Max Sea are more versatile and less expensive, but I’ve gotten great results with Jobe’s and Espoma.

There is an enormous array of fertilizer options on the market. Please do some homework before you just go buy something that promises miracles; especially if you want to use products that are good for the soil.

That’s it for this week. If you try, or have tried, my recommended fertilizers, let me know how it goes.  I’d also love to hear your recommendations.

As mentioned earlier, when we get closer to Spring, I’ll give you my recipe for a dynamite soil mix.  Talk to you soon.

k0284391I should be nestled all snug in my bed as visions of sugar plums dance in my head, but I can’t sleep. Hey, it happens.  This time it’s all about seasonal allergies.  All the weed pollen floating around Georgia found its way into my lungs and I have some kind of chest infection.  As a result, last night my lungs were exploding and I didn’t sleep at all.  Mostly I just panicked.  Then today, I pretty much slept all day. Now tonight, I can breathe well enough to sleep, but I’m not sleepy. Figures. So…I have a cup of tea at hand and decided to talk to you a bit about what I learned from this year’s gardening season. That way, if you can’t sleep either, you can use this post as a sedative.

I learn something every year. Sometimes it’s a lot, sometimes a little, but always something.  If you don’t already keep some kind of a garden journal, I encourage you to start doing so. It can be elaborate, or very simple. I choose the simple route. I use a spiral notebook and a mechanical pencil. Maybe it’s my age, but for whatever reason, the information sticks better if I write it rather than enter it into the computer.

Usually in December I start planning my garden for the next spring.  And here’s a tip to save you some coin.  Many seed companies have end of season sales in December and you can pick up some pretty good deals. 

Anyway, I always write out my garden plan including all the varieties I intend to plant and when I will start the seeds. At the end of the season, I like to take note of what I learned.  That’s what I’m up to tonight as I sip my late night English Breakfast tea.

1.       This was a hard year. In part it was because it was so hot and dry.  Many of the plants really suffered. Besides the heat, my health has been up and down due to some back issues so I didn’t keep up on the weeding very well.  In all honesty, that got out of hand. All in all, it was pretty discouraging.  But I have a plan. Lesson: regardless of experience, some times you’re going to have a bad year. Live with it.

2.       This year it finally sank in that buckets are not very good as containers except for a few select items like snap peas or maybe a cucumber.  For several years I’ve used them for tomatoes, and except for the occasional cherry or grape variety, the results have been marginal, at best.  I like container gardens because of the flexibility, and I’ve always had a lot of buckets because they’re cheap. My logic was that buckets are deep and the roots can really dive deep, but in reality that’s not what most veggies, including tomatoes really want.  This year, my veggies in half barrels and self watering containers did much better than anything in buckets.  I could see the difference as soon as I pulled up the plants after they were done. The roots want to spread out more than go deep.  For example, I had a single zucchini in a 3 ft by 5 ft. 8 inch deep concrete block raised bed that out performed any three zucchini in buckets. The roots spread through the whole bed, the plant was at least 7 feet across and I maybe got 24 or 25 fruit off of it.  The ones in the buckets were a foot tall, 2 feet across and gave me 3 or 4 fruit each.  Soil, nutrients, water were all the same.  The plants in buckets couldn’t spread out.

Similarly, I have one Yellow Moruga Scorpion pepper plant all on it’s own in a container with a wide top and it is twice as large as any other pepper plant, and it has much larger fruit. 

As for tomatoes, I use a popular brand of self watering container that says grow two plants per container.  I always do that, but this year, as an experiment, I took two containers and planted just one tomato and a basil plant. The difference was extraordinary. This revelation has changed my gardening forever.  Lesson: some crops benefit from intensive planting, others want room to spread out. Buckets have limitations. Sometimes spending a little more on larger containers saves in the long run.

For the record, my snap peas and cucumbers did great in the buckets. 

3.       I learned the hard way, that Deep Water Culture hydroponics is not the best way to grow tomatoes outside in Georgia.  The plants got off to a fast start in the green house and were huge and lush.  I had 13 in total. They filled with fruit early. I have never even come close to having tomatoes start off like these DWC ones did.  I was expecting to be canning tomatoes by mid June.  Then the hot weather hit and my hydro tomatoes disappeared as if by dark magic,  despite adding extra oxygen.  The water just got too hot and the roots cooked.  It was ugly and I was extremely disappointed.  Lesson learned.  Lesson: If I’m going to grow hydroponic tomatoes in Georgia, use Dutch Buckets, or another drip system.

4.       Speaking of hydroponic tomatoes, I learned that for me, they don’t taste nearly as good as soil grown ones.  The same is not true for green leafies or cruciferous ones.  I found that if you flush the system of all nutrients and run just water for a few days, like you do with aquaponics, it helps. Lesson: Always flush Hydroponic tomatoes with fresh water for about a week before eating.

5.       Let me stick with tomatoes for one more lesson. On the whole, cherry tomatoes are hardier than slicers. This has been true for me since I started serious gardening many years ago. Whether we’re talking about water shortages, heat index, or even calcium deficiencies, cherry tomatoes have always handled adversity better than their larger, more glamorous cousins. For that reason, I recommend ALWAYS having a few in your garden.  Lesson: Make Cherry Tomatoes a garden staple.

6.       It’s always better to oversize the water pumps on your aquaponics systems. I’ve found that with the exception of very small aquarium type systems, systems don’t turn over as quickly as advertised on the packaging, so It’s valuable to go a size up. The cost increase is marginal and the results are worth it. Lesson: Saving money on the front end, sometimes costs a great deal on the back end.

7.       I’m going to offer one more aquaponics lesson. This year I tried some water fountain/pond filter combinations as an experiment.  Essentially, they are great as a pre-filter or sprayer for oxygenation for the fish tank, but I had no luck using them as stand alone filters.  I tried a 1250 gph combo in a 300 gal system (150 gal fish tank, 2 x 50 gal raft beds, plus sump, and couldn’t keep up with even 30 common goldfish. It was a pretty water feature, but didn’t work as a filter.  Adding a small trickle filter between the Fish tank and first raft would have helped. Alternatively, swapping the sprayer for a media filter would have worked, too.  Fish waste simply requires more filtration than those little boxes can handle. Lesson: While it’s possible to have too little filtration, it’s virtually impossible to have too much. Make sure you have enough space for strong beneficial bacteria colonies.

8.       Mulching matters.  This year, despite having a couple tons of tree mulch available, I didn’t use it.  And I paid the price. Weeds were terrible, and with the dry summer, my watering needs were off the chain. 

In July, I was losing my roses. They were baking.  So I fed them, watered them thoroughly and mulched them well with some pine straw I had in the greenhouse. The benefits were almost instantaneous.  I had no more problems and twice the blooms of last year.  Similarly, I have 3 blackcurrant bushes that positively hate Georgia summers. I mulched two of them and they have tolerated and endured this season despite being on the face of the sun.  The one I didn’t mulch, died.  I fed it and watered it regularly, but it failed.  Lesson indelibly marked on my brain; Mulching is a part of garden essentials. It is not optional.

And there you have it; eight lessons that will make my future gardening endeavors more successful. They will work for you, too. I encourage you to incorporate them into your plans, immediately.

I’d love to hear what you learned this year. Just use the comments section and let’s talk.  Next week will be the first annual ‘Fertilizer issue’.  I will review 3 different commercial products I use(d) and make some recommendations.  Until then, have a great weekend. And remember, if you’re not growing, you’re dying.

suncartoonWe’ve had one heck of a hot summer here in Georgia; and it’s wreaked havoc on our garden.  The heat came early, in late April.  Oh, I forgot to mention, it’s also been dry.  Our summer squash really struggled. I had to harvest the zucchini and cucumbers much earlier (and smaller) than normal to ensure good texture and flavor.

Our strawberries were good and plentiful, but came in much earlier than the last two years.

Frankly, the corn was a disaster. I made some mistakes with it that I will confess in another post, but for now, just know I couldn’t keep enough moisture on it.

I lost my battle over our tomatoes.  They started better than ever.  They were gorgeous until early May.  Once the heat got crazy, I couldn’t get them to produce. They simply don’t like to make fruit in hot weather.  We had an excellent early harvest, but now, only the hardiest cherry tomatoes are prospering.

The green beans and potatoes have been fine.  Harvests were not as big, but quality was good.

Oddly, most years I have real trouble with winter squash. This year, I only planted ONE butternut and ONE acorn squash. They produced like crazy.  I think they liked the warmer weather.  They would have done even better, but our free range rabbits developed a taste for winter squash. 🙂

It’s our peppers, though, that have been most dramatically impacted by this crazy summer.  First, for reasons I’ll explain another day, we didn’t plant at many plants this year.  I planted three bell, 3 mini bell, 8 jalapeno, 4 Doux des Landes, 3 Thai, 3 yellow ghost, 1 yellow Moruga Scorpion, and 4 roasting peppers.  Oh, I almost forgot, we also have 5 habanero plants.

First, only one of my bell peppers survived the heat and a rabbit invasion. To my surprise, the one that survived turned out to be a Giant Aconcagua and not a bell at all. I was elated, because I prefer Aconcagua.

Not a single mini bell survived. I’m pretty sad, because they tend to be so very sweet.  On the other hand, we prefer Aconcagua, Roasters, and Doux des Landes anyway, so it’s all good.

Stumpy, but Potent Jalapeno

Stumpy, but Potent Jalapeno

With the single exception of the Yellow Moruga, all the pepper plants are stunted. Before you ask, they all had plenty of nutrients and compost.  It is my suspicion that the lack of rain played a role. I was forced to use the garden hose from late April, and our water is loaded with chlorine and chloramines. The only water I dechlorinate is for the aquaponics systems and they did very poorly. It was so hot, that even with extra oxygen the raft beds were too warm for the plant roots. Again, more in another post.

While the plants were small, they have been prolific, providing an abundance of pods. The pods on the sweet peppers have all been smaller than normal. The Doux des Landes, for example have mostly been only a little larger than a long red cayenne. They have also had more heat than one would expect. Instead of just a little warm aftertaste, these have had an actual kick.  A few have been full size, but only about 10%.

Ironically, the Moruga plant is gorgeous, large and green.  For whatever reason, though, the rabbits love the taste and we haven’t gotten a single fruit.   They are the only peppers we’ve lost to the bunnies.  Oh well.

The Ghost and habanero plants are smaller than normal, but the fruit is full sized.  The Jalapeno fruit is about half the size of normal summers. The big thing, though, is the heat. Oh my Gosh, are the hot peppers hot.  It’s like everything has been sized up.  My wife and in laws swear the Jalapenos are like Habaneros.  I don’t think they are quite that hot, but boy howdy, they pack a punch. Most years, I snack on them like a sweet pepper.  Not this year. No sir, not this year.

As for the Habaneros, although they are common orange ones, I’d compare them to Red Savina. And as for the Yellow Ghost, they are hot like red ones. The first one I ate, I was disappointed at first, because it didn’t hit at all for about 20 seconds. Then it suddenly turned to shock and awe. I love that. It’s deceptive.

All I can guess is that the extra heat stressed the peppers which often intensifies the heat. And this year’s heat is INTENSE. Yay!

Miniature Doux des Landes

Miniature Doux des Landes

My disappointment in the early setbacks has been replaced by delight due to the flavor.  All varieties hot and mild are bursting with it. And there are a lot of flowers and young pods still developing.

How has your garden done?  I’d love to hear about it.

Talk to you soon.


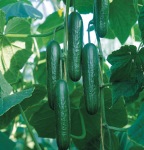
CucumberCucumbers are without doubt one of my favorite summertime treats. They are easy to grow and delicious. Its virtually impossible to over water them, and they make even the most novice gardener feel successful.

Over the years, I’ve grown several varieties including, Ashley, Marketer, Boston Pickling, Lemon and Diva; but my absolute favorite is Socrates.

Here is a link to my YouTube review of it.  Click HERE

You can get seeds from number of sources, I get mine from Johnny’s Select Seeds out of Maine.

Please use the comments section and let me know all about your favorite cukes.

 It appears that Aquaponic Gardening in the USA is continuing to gather interest throughout the country, but it’s also facing a great deal of turnover due to the expense and fairly steep learning curve of start up.  Many excited newcomers, balk after seeing the high cost of pre made kits, or even the complicated nature of DIY when compared to growing in raised beds or traditional in ground gardens.

For those who manage a successful set up, new unforeseen headaches appear with water. Who really knew dechlorination and pH balance would be so time consuming and pricey, or that maintaining a thriving colony of bacteria that continuously convert ammonia to nitrites then nitrates is not as easy as it looks in diagrams or on YouTube.

Oh, let’s not forget about the fish. Waking up to fish floating in your tank is not only expensive, it’s discouraging, especially when you’ve poured a lot of hard earned money into having (Usually) Tilapia shipped from halfway across the country, only to watch them die in the first month or six weeks. In my case, I spent several hundred dollars learning that I could not raise redclaw crayfish here. I’m a slow learner.

The failure rate of ‘commercial’ ventures is even greater. The USA landscape is littered with abandoned Aquaponics systems that were going to make a fortune by selling premium products at premium prices to an ever growing health conscious public, who’ve grown tired of poisoning themselves with traditional supermarket fare.

The truth is, that there are only a relatively few places in America where the demographic that can afford premium prices, the proper climate for successful Aquaponic Farming, and would be entrepreneurs with the fortitude and work ethic to succeed are able to intersect.

I know some awesome people in west central and central Florida who are making it happen. I cannot promote them too highly. But they also work their butts off to make it happen.  Many, if not most, Aquaponics dreamers are simply not prepared to pay that price.

A large percentage of the success stories in the more temperate climates are not really commercial ventures at all, but are non profits, dependent on grants, gifts and donations to stay afloat. To be clear, there’s nothing wrong with the model per se, but running a non profit is a whole different animal and requires a different set of skills than a for profit commercial farm.  Many would be Aquaponic farmers miss that difference and are destined for failure from the beginning.

Like its older sibling, hydroponics, Aquaponic farming is NOT the future of food production. It has its appeal, it has a niche where it can be successful, but it is not going to begin replacing traditional gardening and farming anytime soon.

If you have stayed with me this far, you probably think I’m some kind of hater or have sour grapes about my own lack of success with aquaponics. If that’s what you think, you would be wrong by a mile. In fact, I am within a few days of setting up my 2016 backyard aquaponics system, and I already have several hydroponic projects going.

What I want to do, is cut through a lot of the boloney and help you be successful, or at least help you set realistic expectations if you’re new to aquaponic gardening, especially if you’re on a budget.

I have no intention of discussing how to begin a commercial aquaponics farm.  I understand marketing and sales, because that’s my background, and I’m an entrepreneur to the marrow in my bones, but I have no experience in commercial aquaponics farming, and I will not pretend I do. A successful commercial aquaponics farm is a unique animal. It will require capital, patience and night and day work for a long time.  I will tell you that, as I’ve already mentioned, location is mission critical. Out here where my wife and I live, such a venture would be a disaster. If you are really keen on investigating how you might launch a commercial project, email me, or use the comments section and I’ll be happy to direct you to some people in the business who will give you good answers without the bull. This article is for people who want to begin a backyard, basement, or garage system.

First, understand that you can build several raised beds or buy a whole lot of containers for what a backyard aquaponics system is going to set you back. A small ‘off the shelf system’ that will keep a handful of fish and grow a few veggies will cost you over $1000.  If you’re going to grow in your garage or basement you’re going to have to add in costs of lighting and water temperature regulation, which can be significant. 

If you’re going DIY it can be much cheaper, but still significant. First there is the cost of Fish Tanks and grow beds. Will you use plastic barrels, IBC containers, stock tanks, or some other container? Your cost will be determined by what you choose and where you source it. I have historically used plastic barrels and stock tanks, but I also have some IBC totes for potential future use.

Plumbing costs money. There is the pvc, fittings, valves, hoses, cutting tools to consider, in addition to the costs of a filtration system.  Unless you already have an off grid power supply, you’re going to have to find a way to operate the water and air pumps. If you plan to run year round you’ll also have water heating costs.

Now, for the fish. Most of us began with Tilapia. Most of us failed. If you live in in Florida, south Texas, Arizona, Nevada or Southern California, you might get away with it. For most of the USA, however, the only way to successfully raise Talipia, is to heat the water at least part of the year and/or to raise them inside. When water temps get below 50 degrees F, Tilapia are going to die. For example, my inlaws live in west central Florida just south of Tampa Bay.  They have wild Tilapia in the ponds and lakes around them. A couple of years back, during a particularly cold spell, tens of thousands of Tilapia died and floated to the surface of the local ponds. Now just imagine what would happen here in north Georgia, or Kentucky, or Indiana, or Montana, or Maine. I think you get the picture. Tilapia can handle a wide range of water quality conditions, but water temperatures are literally a killer.

I was successful growing Tilapia in my basement and garage when we lived in town, but it wasn’t cheap. I gave up very quickly once we moved out here in the country. The cost of heating water in my greenhouse was prohibitive.

On the other hand, I love gardening and many things grew better in aquaponics than they did for me using more traditional methods, so I started thinking outside the Tilapia.

After it became just too expensive to raise Tilapia, I tried bluegill and catfish. They grow great here. I suggest you look into what might work in your area. In many places, especially north of the Mason Dixon, Yellow Perch are a good option. They grow relatively quickly and are extremely tasty.

In our case, my wife doesn’t eat fresh water fish, so it was pointless growing them. If I want some crappie filets, I just go to the lake and catch some. Easy.  The last two summers, I’ve grown goldfish.  They are 20 cents apiece at the pet store. That price is hard to beat. If you don’t eat fish, if you are on a budget, or if you don’t intend to grow year round, goldfish may be a great option.

Other options include minnows and Koi. Minnows are cheap, easy to raise, and can be used, or sold as bait for crappie and bass fishing.  Our ducks like them, too. Koi are often in demand for backyard ponds and can easily pay for themselves.

Koi, minnows, goldfish, bluegill, catfish, and many other varieties can be overwintered if the tanks are deep enough, but my wife and I have decided that growing all year round is not worth it for us. We live in Bartow County Georgia, not Adelaide, Australia. 

My systems work this way. I set up my system(s) in April, stock it with goldfish, and grow exclusively lettuces, herbs and greens in raft (DWC) systems. By doing this and using plenty of oxygen in the water, I can keep growing lettuces almost all summer. I can also grow Okra very successfully in rafts.  By growing these things aquaponically and hydroponically, I have lots more room in my traditional garden for tomatoes, peppers, melons and etc.

Once fall comes, I will grow some kale and swiss chard. Then once things get too cold for gardening to be fun, I take the system down for the winter. The fish will be fed to the ducks and chickens. It’s that simple.

Aquaponics can be fun and rewarding. To make sure it is, think about where you live. What fish will work where you are? Do you want to eat your fish, or will they be just for aesthetic enjoyment?  Will you grow seasonally or all year round? Will you grow outside or in? What’s your budget?

In short, do your homework. It’s the equivalent of measure twice, cutting once. And by all means, think OUTSIDE the Tilapia.

Please email me with any questions or add your comments. After all, we’re in this together.


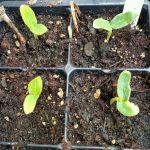
Time to transplant into cups, but too early for putting in garden

Time to transplant into cups, but too early for putting in garden

As winter comes to a welcome close, it’s time for me to fire up all engines and get this site moving for the season. I do hope you had a great off season and are ready for spring planting; but not too ready!

Here in our part of North Georgia (zone 7b), we’ve had a glorious end to February and an even better beginning to March. As I understand it, other parts of the country have had similar experiences. As a result, the seedlings in our greenhouse are way ahead of schedule.  They’ve had lots of sunshine and nice weather to keep them happy in their nursery.

Our snap peas are already starting to climb their trellises and our tomatoes look about three weeks ahead of normal.  It will be near 80 here today, with gentle breezes and a good mix of sun and cloud. It’s hard not to love this. I’m not even going to try. It’s awesome.

The problem is, I’m already hearing people discuss putting out their gardens.  Please don’t.  Sure, your kale and cabbage, etc. will be ok, but keep those tomatoes, peppers, squash and such inside until you have passed the final ‘frost date’ for your area. You can GOOGLE your dates or you can contact your local extension office.  Here in Bartow County, GA the last frost date is April 15.

We are blessed to have a small greenhouse where we can keep seedlings and young plants to give them a head start, which makes it easy to be patient, but I remember the days before the greenhouse when early spring weather saw us out in mid to late March setting tomatoes, peppers, cantaloupe and all the other starter plants that should have waited another month.  More than once, my wife and I have had to rush out and cover plants because we heard the weather was changing. And, more times than I care to recall, we’ve been surprised by sudden frosts that have forced us to start over. Starting over can get pretty expensive.

Cucumbers will stay safe in the greenhouse until Mid April

Cucumbers will stay safe in the greenhouse until Mid April

urge you to enjoy early warm spells. Get outside and get your hands dirty. Prepare your beds, build new ones. Get your compost bins going. Work up the soil, but don’t set out anything that can be damaged by frost.  Frankly, even though I could put out my brassicas, I tend to leave them in the greenhouse as long as possible. Because we grow mostly in containers, it’s easy to do. Alternatively, I can bring my containers inside at night and put them out during the day.

I’d love to here how you handle the temptation to set plants out early. Feel free to share your successes AND failures. Just hit the comment button and join the conversation. And…if you need me to talk you down, just ask. After all, we’re in this together.


Hydroponic Kale

Hydroponic Kale

People spend virtual (and sometimes, literal) fortunes trying to improve their gardens. We buy books and magazines, we attend seminars and lectures, we listen to radio shows and watch gardening television channels. Many folk even hire designers, landscapers and gardeners to do the work for them. On top of that, we search far and wide for the finest soil amendments and nutrients.

Gardening is BIG BUSINESS, and often a big expense, so I thought I’d offer for FREE, an often overlooked gardening secret that will kick your success into overdrive. It’s so simple, you’ll be inclined to think I’m overstating the case, but I’m NOT.

This secret is the same whether you’re growing in the ground, in raised beds or in containers. It’s also the absolute biggest open secret in Hydroponic and Aquaponic gardening. Oxygen!

Surprised? Feeling underwhelmed? Don’t be. Pretty much everything in nature needs oxygen in spades.  Sure, nitrogen, phosphorus, potassium and carbon dioxide are important nutrients, but you can put all the fertilizer in the world on you plants and if oxygen isn’t getting to the roots, the plants will not thrive.

Lots of new gardeners discover this when they spend good money on bags, or truck loads, of expensive topsoil only to find their gardens are not producing like they had hoped. The topsoil is just too darned dense for the roots to get oxygen.

If you add good soil amendments, like peat or coconut coir, tree mulch, perlite, or in some situations, small lava rocks, you will get almost instant results. I like perlite and sphagnum or coco peat added to my worm compost (not just castings) and a little straw as my favorite soil mix or amendment. This gives me lots of nutrients plus is loose enough for oxygen to get in and for the roots to spread out in search of the water and food it needs.

Similarly, in my Deep Water Culture hydroponics and aquaponics systems, I have seen results skyrocket by doing nothing more than adding extra oxygen to the grow beds and fish tanks.

I’m not a scientist, I’m a farmer. I learn by experimenting. I have watched healthy plants shrivel and die when the oxygen supply to the roots is cut off, even if adequate nutrients are available.  On the other hand, I’ve seen plants flourish with less than optimal nutrient and climate conditions, if the oxygen supply is optimal.

Kale bouquet. Think my wife will like them?

Kale bouquet. Think my wife will like them?

Let me use my hydroponic kale as an example.  Last winter, I grew Deep Water Culture (DWC) kale, swiss chard, lettuce and bok choi all winter long in my small unheated greenhouse. To keep the water temps up, I used a fish aquarium heater at night and let the sun do the work during the day. I kept the nutrients and water topped up and used plenty of oxygen. The results were off the charts.

In another system, designed the same, but using only half the oxygen, results were seriously reduced, and the plants were more susceptible to aphids.

Finally, this fall, I have been growing kale outside in a DWC hydro system with phenomenal results (see the pics in this article). I have not adjusted pH or nutrient levels.  Frequently, my top ups have been provided by rain. Sometimes, I top up with the garden hose, using city water. I have not treated the chlorine or chloramines.  All I have done is keep the oxygen levels up with lots of air stones.  I have not done a complete nutrient replacement and have topped up with nutrients only about every 3rd or fourth top up.  I got similar results last spring with cabbage, broccoli and kohlrabi.

Your plants need proper light and nutrients to be optimal, but before you spend a bunch of money trying more fancy foods and supplements, try making more oxygen available and see what happens.

Now it’s your turn. What’s been your experience with oxygen and your garden? For that matter, what’s been the one thing you’ve done or change you’ve made that has made the biggest impact on your results? I’d love to hear your experiences. After all, we’re in this together.
 

Northwich - allotment gardens and recreation area beside Birdcage Walk. Seen from the footbridge over the railway on Northwich footpath 12. SJ 6528 7385 at 295 deg.

During the gardening ‘off season’, my plan is to write a series of encouragement and ‘how to’ articles with the beginner and wannabe gardener/homesteader in mind.  There is a lot of good information available for getting started down the road of increased self-sufficiency, but there’s even more misinformation and ignorance being tossed around out there. My goal is to simplify the process of gardening and homesteading to make it accessible for more people. It is my belief that nearly EVERYONE can grow some or all of their own food, regardless of your age, or where you live.

Sure, some situations require more thought and planning than others, but whether you live on a large acreage, in a suburban HOA controlled neighborhood or in a big city high rise, the only thing holding you back is you.  If you’ll join me, and stay the course, I’ll have you ready to grow by next spring. I guarantee it.

I hear regularly from people who say things like, “Someday, when we have some land, we’re going to do what you do,” or, “We’d love to live a more self-sufficient lifestyle, if we only had the land to do that.”

If you are thinking those, or similar thoughts, I have some GREAT news for you: you can get started right where you are.

Stop laughing, I’m serious.  Do some research and learn about the Dervaes family in California, who live on 1/10th of an acre and not only provide their own food, but operate a full time thriving farm from their suburban plot.

I know plenty of stories of families living self-sufficiently, or virtually so, from a quarter of an acre.

We’re all rather familiar with the “Victory Gardens” that sustained many millions of people during WWII.

And let’s not forget about the allotment gardens (community gardens) that dot the British landscape each spring through fall, where families can rent small spaces to grow their own food. The British Parliament has passed laws that require local governments to provide spaces for allotments, if there is a demand. Here in the USA, some towns and many Churches could make space available for community growing.

My point is, it doesn’t take acres and acres to become self-sufficient; it takes creativity, out of the box thinking and elbow grease. If you want to start growing your own fruits and vegetables, and maybe your own meat, fish and/or eggs, you don’t have to wait until ‘someday’. In point of fact, I looked, and someday isn’t on any calendar, somewhere isn’t on any map, someone isn’t in any phone book. There is today, here, and there is me (you).

Brittan and I began our edible suburb when we lived on ½ acre in a typical suburban neighborhood, under the watchful eyes of a Home Owners’ Association. In that location we grew tons of fruit and vegetables, made our own compost, raised rabbits for meat and manure, raised fish and even managed to sneak in a few goats and chickens from time to time.

I share that last paragraph to help you understand that I KNOW from experience what can be done. I’ve grown fish and vegetables in my garage, herbs on our back deck, kept rabbits in the basement, and once we even hid 150 baby chicks in our garage for 10 weeks.

During the next several weeks, I’m going to show you a step by step plan to make sure you can succeed in your own edible suburb, but it will be up to you to implement what you learn.

I hope you’ll join the adventure. Please add your thoughts and questions to the comments section, or email any questions to us.  Also, please email or comment and let me know some of the subjects you’d like to discuss. I’d love to hear from you. Let’s do this!


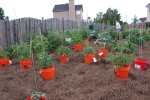
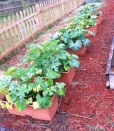
One of our first attempts at container gardening

One of our first attempts at container gardening

Walking through the garden the other day, examining my raised beds and my containers I realized for like the one millionth time, how much I prefer containers to either the raised beds or to a traditional tilled garden spot.

I use a variety of containers: buckets, flower pots, Earthboxes, and Rubber Maid Stock Tanks, plastic barrels and IBC totes. Some of my older buckets and pots are pretty traditional, but my newer ones and all the other containers are set up as either wicking containers, DWC hydroponics or Aquaponics systems.

I use different methods for the simple reason that if something isn’t working, another style probably is. For example, my raised bed zucchini did not do well this year, but in wicking buckets it thrived like never before. On the other hand, my pole beans did so well in a raised bed I didn’t bother with any other ways. My hydroponics kale has outperformed that grown in either raised beds or buckets. Gardening is full of surprises, so variety really is the spice of life.

Please don’t get defensive if you’re a raised bed or tilled bed gardener. I don’t disapprove of them, I’ve just gotten better results (mostly) from other methods. Your experience may be totally different.

There are three primary reasons I like containers: Mobility, simplicity, and Spontaneity.  Let’s dive about two inches into that and let me explain.

  1. Mobility – We live in NW Georgia right on the edge of Zone 7 a/b. and we have a medium sized greenhouse (40’ x 24’). Our great weather allows us multiple growing seasons already, but by combining the benefits of containers and the unheated greenhouse I can get a very big head start in the spring and extend the season in the fall dramatically.
Earthbox wicking containers

Earthbox wicking containers

I plant many of my varieties in January, and by mid-April they are already quite large when I move them outside. I’m usually harvesting snap peas, cabbage, Jalapeno peppers, kale, bok choi and lettuce long before most of my neighbors. By growing Parthenocarpic zucchini and cucumbers, my wife and I were enjoying them in March.

Similarly, when night temps begin to drop, I can move containers from the garden back to the greenhouse and continue to enjoy fresh peppers, tomatoes, zucchini, etc. until very nearly Christmas. Greens will keep growing all winter.

Even before we had our greenhouse, I would take my hot pepper buckets and set them up against the south side of the house to keep them producing even after the garden was getting regular frost.

I could never do that with my raised beds. For example, I have some very healthy roasting pepper plants in a raised bed that I’m going to have to make a cover for because I can’t get the bed into the greenhouse.

Even the hydroponics and aquaponics systems can be emptied and moved relatively easily. Because I use compact systems that don’t have a great deal of complex plumbing, it’s mostly a matter of emptying the beds and tanks, then reassembling them inside or outside as need requires.

  1. Simplicity – Containers are uncomplicated. There is very little preparation or space required. It’s a matter of filling with your favorite planting mix, inserting your chosen seed(s) or seedling(s) and you’re gardening. There are no special tools or groundwork required. The most important decision is the size of the container. You wouldn’t want to put an indeterminate tomato in a window box, but that container might be just fine for cilantro.

Weeding is a snap, as is mulching. Watering is generally required more frequently that with raised beds or tilled gardens, but wicking containers can mitigate the work load, as can automated watering systems.

  1. Spontaneity – If I get impulsive (which happens to me a lot) and want to try a new variety or increase number of plants after my garden is already planted, containers allow me to simply grab a new bucket and try it. Similarly, if a plant is not thriving, I can pull it up and begin again without the risk of damaging the plants around it. When plants are getting ready to flower, I can decide at the last minute to isolate one or two for seed saving by moving the container a little and using row covers for protection. This is especially useful for peppers and tomatoes.

Container gardening is an outstanding option for beginners and gardeners with small spaces. And it doesn’t have to be expensive. You can repurpose buckets and flower pots you already have around, or you can buy very inexpensive ones from your local Big Box Store or online.  Let’s face it; you can buy a lot of containers for the cost of buying and maintaining a rototiller.

We haven’t had a tilled garden since 2001, when we lived in Iowa. With our busy schedule and my ADD that option just wouldn’t fly. We have a few raised beds, most of which are being converted to growing berries.  We have many dozens of containers. If you consider aquaponic and hydroponic systems as containers (which I do) then our garden is 90% containers. And I wouldn’t have it any other way.

Are you a container gardener? Why or why not? I’d love to hear your experiences. Please share. I value your opinions. Besides, we’re all in this together.